Blog Archives
Setup OpenSSH (Cygwin) for public key authentication
It took me awhile to realize that my SSHD installation on my Windows 2012R2 was not ready yet to accept public key authentication, which is a key feature. If we want to automate some tasks we need passwordless authentication to our Windows 2012 R2 server.
By default sshd is running under Local System account and this is in conflict with implementation of public key authentication of OpenSSH in Cygwin. If you recollect from my last post, special account was created, called cyg_server:
*** Info: On Windows Server 2003, Windows Vista, and above, the
*** Info: SYSTEM account cannot setuid to other users -- a capability
*** Info: sshd requires.  You need to have or to create a privileged
*** Info: account.  This script will help you do so.

*** Info: It's not possible to use the LocalSystem account for services
*** Info: that can change the user id without an explicit password
*** Info: (such as passwordless logins [e.g. public key authentication]
*** Info: via sshd) when having to create the user token from scratch.
*** Info: For more information on this requirement, see
*** Info: https://cygwin.com/cygwin-ug-net/ntsec.html#ntsec-nopasswd1

*** Info: If you want to enable that functionality, it's required to create
*** Info: a new account with special privileges (unless such an account
*** Info: already exists). This account is then used to run these special
*** Info: servers.

*** Info: Note that creating a new user requires that the current account
*** Info: have Administrator privileges itself.

*** Info: No privileged account could be found.

*** Info: This script plans to use 'cyg_server'.
*** Info: 'cyg_server' will only be used by registered services.
*** Query: Do you want to use a different name? (yes/no) no
*** Query: Create new privileged user account 'ACMEHOST\cyg_server' (Cygwin name: 'cyg_server')? (yes/no) yes

*** Info: Please enter a password for new user cyg_server.  Please be sure
*** Info: that this password matches the password rules given on your system.
*** Info: Entering no password will exit the configuration.
*** Query: Please enter the password: mysecret
*** Query: Reenter:

*** Info: User 'cyg_server' has been created with password 'mysecret'.
The important info is this:
*** Info: It’s not possible to use the LocalSystem account for services
*** Info: that can change the user id without an explicit password
*** Info: (such as passwordless logins [e.g. public key authentication]
*** Info: via sshd) when having to create the user token from scratch.
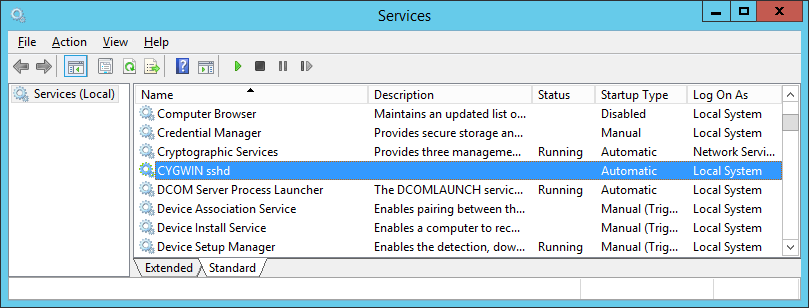
So, the first thing that we need to do is to stop “CYGWIN sshd” service and change logon account for the sshd service as shown on the following screenshots:


At this point you can not start the service yet, if you try you’ll find in /var/log/sshd.log the following error:
/var/empty must be owned by root and not group or world-writable.
What we need to do is to change owner of the directory /var/empty from SYSTEM to cyg_server. Open cygwin.bat and run:
// check current permissions

$ ls -al /var/empty

total 0
drwx------+ 1 SYSTEM ACMEHOST+None 0 Mar  6 12:10 .
drwxr-xr-x+ 1 alesk ACMEHOST+None 0 Mar  6 12:10 ..

or with:

$ getfacl /var/empty

# file: /var/empty
# owner: SYSTEM
# group: ACMEHOST+None
user::rwx
group::---
other:---
default:user::rwx
default:group::r-x
default:other:r-x

// So I tried to change the owner to cyg_server:

$ chown cyg_server /var/empty
invalid user cyg_server

// What? At first I didn't know why is cyg_server invalid, but then
// I realized that I added only one (my) account in /etc/passwd, so I
// need to append cyg_server user as well:

$ mkpasswd -l -u cyg_server >> /etc/passwd

// restared cygwin.bat shell and run

$ chown ACMEHOST+cyg_server /var/empty

Remember that by default username is prefixed by hostname.

// if you ever wish to change back to Local System account,
// all that is needed is to again change Service account
// under which CYGWIN sshd is running and owner of /var/empty:

$ chown SYSTEM /var/empty
At this point you should be able to start “CYGWIN sshd” service under local cyg_server account. The last thing you need to do is to test the connection with public key authentication. I used Mobaxterm for that on my workstation ACMEWKS, but you could as easily use Cygwin SSH on your workstation:
In MobaXterm window:
We need to generate some public-private keys. Note that in our case we need PK keys for passwordless authentication, so we didn't password protect rsa private key in the example that follows.

[alesk.ACMEWKS] ? ssh-keygen -t rsa

Generating public/private rsa key pair.
Enter file in which to save the key (/home/mobaxterm/.ssh/id_rsa):
Enter passphrase (empty for no passphrase):
Enter same passphrase again:
Your identification has been saved in /home/mobaxterm/.ssh/id_rsa.
Your public key has been saved in /home/mobaxterm/.ssh/id_rsa.pub.
The key fingerprint is:
9a:da:35:e8:ca:6a:14:e4:f0:8c:10:1c:21:41:fe:81 alesk@ACMEWKS
The key's randomart image is:
+--[ RSA 2048]----+
|**o              |
|=.o              |
|.E .             |
|. * .            |
|   o    S        |
|  .    +         |
| .    + o        |
|  .. + . .       |
| ...+.o          |
+-----------------+

Remember, that /home/mobxterm/.ssh is volatile, after you close the MobaXterm this directory is gone, so you should copy public/private keys to some local, permanent directory....

[alesk.ACMEWKS] ? ls -al /home/mobaxterm/.ssh
total 5
drwx------    1 alesk   UsersGrp         0 Mar  5 15:46 .
drwx------    1 alesk   UsersGrp         0 Mar  5 11:09 ..
-rw-------    1 alesk   UsersGrp      1675 Mar  5 15:46 id_rsa
-rw-r--r--    1 alesk   UsersGrp       396 Mar  5 15:46 id_rsa.pub
-rw-r--r--    1 alesk   UsersGrp       171 Mar  5 09:11 known_hosts

[alesk.ACMEWKS] ? mkdir /cygdrive/g/ssh
[alesk.ACMEWKS] ? cp /home/mobaxterm/.ssh/id_rsa* /cygdrive/g/ssh

// copy public key to remote host
[alesk.ACMEWKS] ? scp /cygdrive/g/ssh/id_rsa.pub alesk@ACMEHOST:~/.ssh

// append previoulsy copied public key to authorized_keys on remote host
$ ssh alesk@ACMEHOST  'cat ~/.ssh/id_rsa.pub >> ~/.ssh/authorized_keys'
Now, we can try to connect from ACKMEWKS to ACMEHOST with PK authentication:
[alesk.ACMEWKS] ssh -i /cygdrive/g/ssh/id_rsa alesk@ACMEHOST
You should be logged on ACMEHOST without prompt for a password. Properly protect private key. Better yet, you should limit what someone can execute execute via passwordless ssh connection with the help of prefix in authorized_keys file for each public key (see this for an example).
And finally, you can troubleshoot ssh connection by turning on verbose mode (-v, -vvv), for example:
[alesk.ACMEWKS] ssh -vvv -i /cygdrive/g/ssh/id_rsa alesk@ACMEHOST
Installing OpenSSH (Cygwin 1.7.35) on Windows 2012 R2
Whenever I need some Cygwin functionality on my Windows hosts, I always prefer pre-packaged solutions (Mobaxterm for ssh client on Windows, CopSSH for SSHD, etc.). This time around I needed a free SSH server for Windows 2012R2 host without the limits imposed by recent CopSSH free version. I decided that I’ll try to use SSHD from cygwin.com directly, something that I tried to avoid in the last decade.
1) INSTALLATION
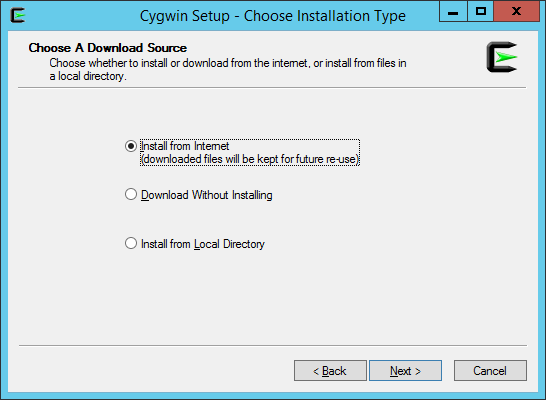
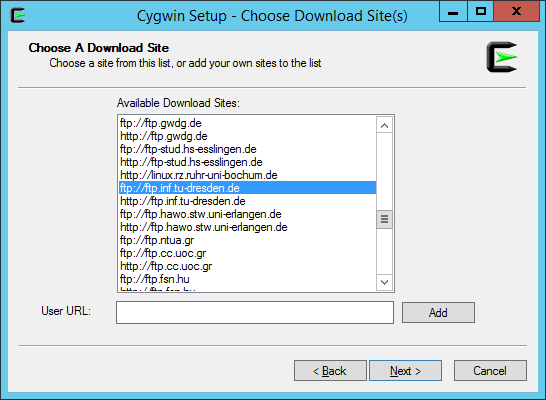
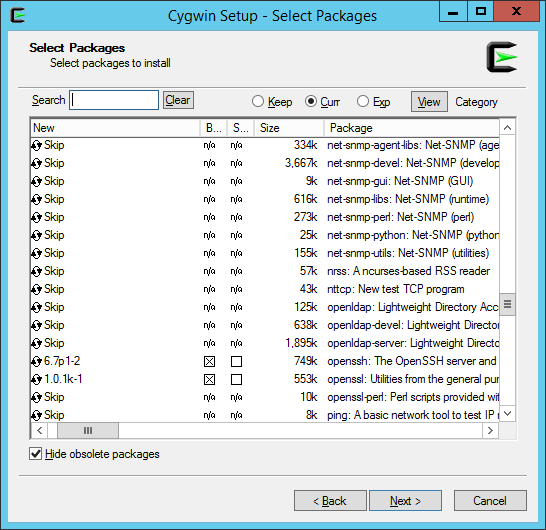
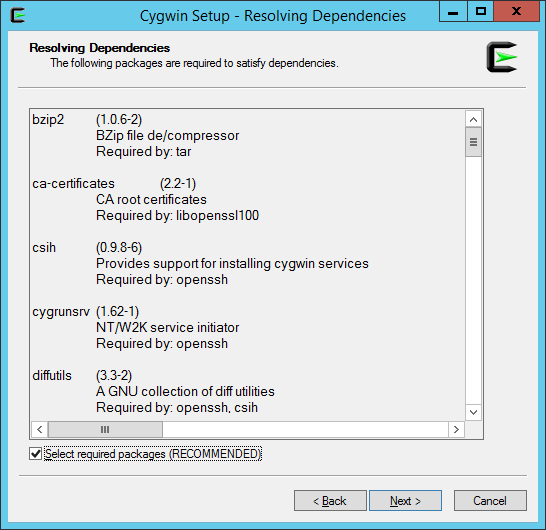
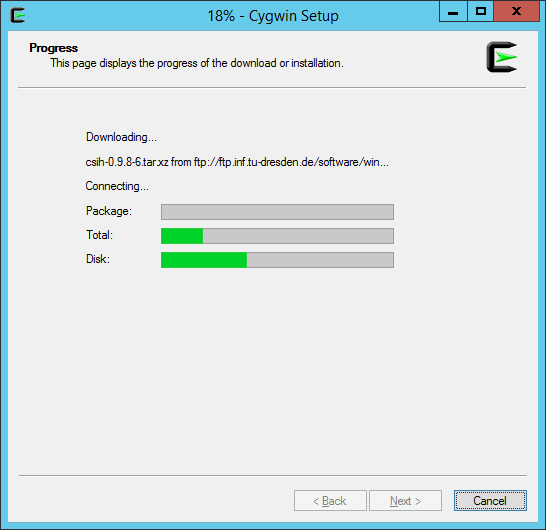
First you’ll need to download installer from cygwin.com, save the file in some temporary directory. I downloaded 64-bit version because I’ll be installing 64-bit packages. More precisely, I selected the following packages and their dependencies: nano, zip, unzip, OpenSSH, openssl and rlwrap.
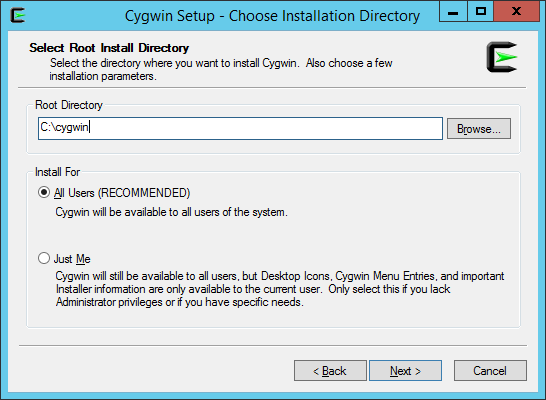
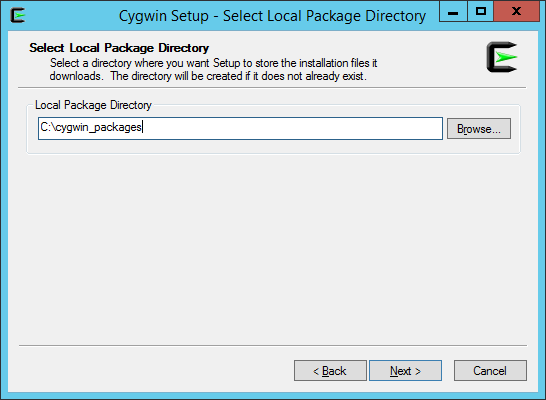
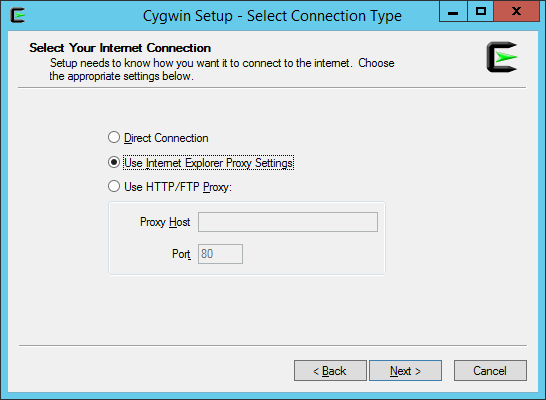
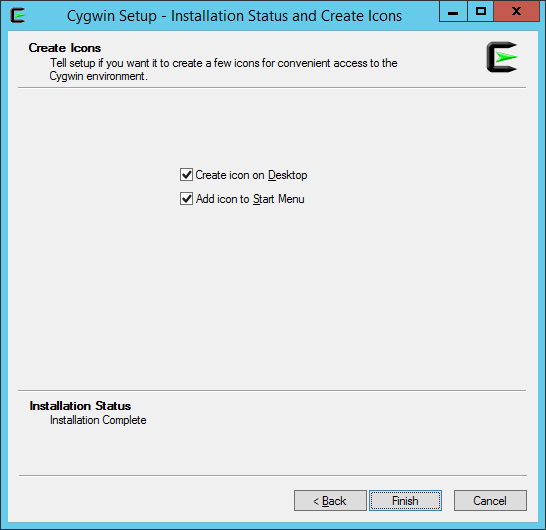
Run the installer and follow the wizard, here are screenshots from my host:

2) CONFIGURATION
2.1 Should we edit cygwin.bat?
You’ll probably find numerous recommendation on the net (and even in Oracle documentation — “Enterprise Manager Cloud Control Basic Installation Guide”) that first thing you should do is to open cygwin.bat and insert line set CYGWIN=binmode ntsec, so that bat would look like:
notepad c:\cygwin\cygwin.bat
@echo off

C:ssh
chdir C:\cygwin\bin
set CYGWIN=binmode ntsec      << INSERTED LINE
bash --login -i
Both parameters are obsolete in cygwin 1.7, so I believe we can safely skip this step and leave cygwin.bat in original state.
2.2 Test installation
Open C:\cygwin\cygwin.bat and run:
$ cygrunsrv -h
and you should see help for cygwrunsrv, otherwise something went wrong and you’ll likely have to re-install.
2.3 Configure SSHD service by opening cygwin.bat with “Run as Administrator” privilege:
$ ssh-host-config
*** Info: Generating missing SSH host keys
ssh-keygen: generating new host keys: RSA1 RSA DSA ECDSA ED25519
*** Info: Creating default /etc/ssh_config file
*** Info: Creating default /etc/sshd_config file

*** Info: StrictModes is set to 'yes' by default.
*** Info: This is the recommended setting, but it requires that the POSIX
*** Info: permissions of the user's home directory, the user's .ssh
*** Info: directory, and the user's ssh key files are tight so that
*** Info: only the user has write permissions.
*** Info: On the other hand, StrictModes don't work well with default
*** Info: Windows permissions of a home directory mounted with the
*** Info: 'noacl' option, and they don't work at all if the home
*** Info: directory is on a FAT or FAT32 partition.
*** Query: Should StrictModes be used? (yes/no)  yes

*** Info: Privilege separation is set to 'sandbox' by default since
*** Info: OpenSSH 6.1.  This is unsupported by Cygwin and has to be set
*** Info: to 'yes' or 'no'.
*** Info: However, using privilege separation requires a non-privileged account
*** Info: called 'sshd'.
*** Info: For more info on privilege separation read /usr/share/doc/openssh/README.privsep.
*** Query: Should privilege separation be used? (yes/no) yes

*** Info: Note that creating a new user requires that the current account have
*** Info: Administrator privileges.  Should this script attempt to create a
*** Query: new local account 'sshd'? (yes/no) yes

*** Info: Updating /etc/sshd_config file

*** Query: Do you want to install sshd as a service?
*** Query: (Say "no" if it is already installed as a service) (yes/no) yes
*** Query: Enter the value of CYGWIN for the daemon: [] binmode ntsec

*** Info: On Windows Server 2003, Windows Vista, and above, the
*** Info: SYSTEM account cannot setuid to other users -- a capability
*** Info: sshd requires.  You need to have or to create a privileged
*** Info: account.  This script will help you do so.

*** Info: It's not possible to use the LocalSystem account for services
*** Info: that can change the user id without an explicit password
*** Info: (such as passwordless logins [e.g. public key authentication]
*** Info: via sshd) when having to create the user token from scratch.
*** Info: For more information on this requirement, see
*** Info: https://cygwin.com/cygwin-ug-net/ntsec.html#ntsec-nopasswd1

*** Info: If you want to enable that functionality, it's required to create
*** Info: a new account with special privileges (unless such an account
*** Info: already exists). This account is then used to run these special
*** Info: servers.

*** Info: Note that creating a new user requires that the current account
*** Info: have Administrator privileges itself.

*** Info: No privileged account could be found.

*** Info: This script plans to use 'cyg_server'.
*** Info: 'cyg_server' will only be used by registered services.
*** Query: Do you want to use a different name? (yes/no) no
*** Query: Create new privileged user account 'ACMEHOST\cyg_server' (Cygwin name: 'cyg_server')? (yes/no) yes

*** Info: Please enter a password for new user cyg_server.  Please be sure
*** Info: that this password matches the password rules given on your system.
*** Info: Entering no password will exit the configuration.
*** Query: Please enter the password: mysecret
*** Query: Reenter:

*** Info: User 'cyg_server' has been created with password 'mysecret'.
*** Info: If you change the password, please remember also to change the
*** Info: password for the installed services which use (or will soon use)
*** Info: the 'cyg_server' account.

*** Warning: Expected privileged user 'cyg_server' does not exist.
*** Warning: Defaulting to 'SYSTEM'

*** Info: The sshd service has been installed under the LocalSystem
*** Info: account (also known as SYSTEM). To start the service now, call
*** Info: `net start sshd' or `cygrunsrv -S sshd'.  Otherwise, it
*** Info: will start automatically after the next reboot.

*** Info: Host configuration finished. Have fun!
Note the line 33:
*** Query: Enter the value of CYGWIN for the daemon: [] binmode ntsec
Here you should enter any env. variables for cygwin daemon if any. I did NOT set those two variables, they’re here only as a note point. According to cygwin documentation, both parameters are obsolete since Cygwin 1.7, I believe the only reason both parameter are still listed, even in Oracle current documentation, is that someone found some old “how-to” on the net (which was valid before 1.7 release) and took it as granted.
After configuration you should check services, you should see CYGWIN sshd….
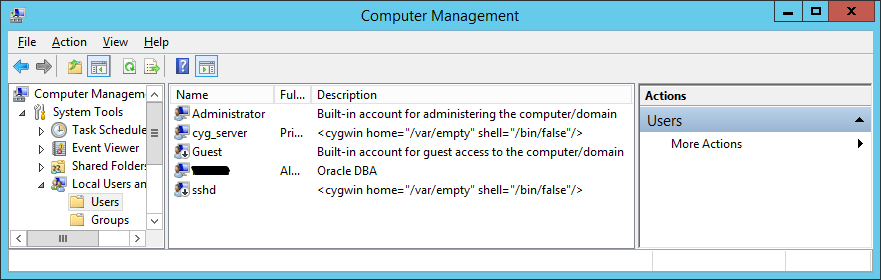
and two new local accounts, cyg_server and sshd…
2.4) Enable existing local user account to connect to SSH daemon
// take a backup if by any chance you already have a passwd file (not the case for fresh installation!)
copy C:\cygwin\etc\passwd C:\cygwin\etc\passwd.bak
Open cygwin.bat:
$ /bin/mkpasswd -l -u alesk >> /etc/passwd
The above command will write something like this in the passwd file:
ACMEHOST+alesk:*:197610:197121:U-ACMEHOST\alesk,S-1-5-21-1611771360-925472152-3555864332-1002:/home/alesk:/bin/bash
It means that you can connect to ACMEHOST from some remote workstation with:
$ ssh ACMEHOST+alesk@ACMEHOST
Not cool. I prefer using, simple:
$ ssh alesk@acmehost
so, I changed the username in /etc/passwd to:
alesk:*:197610:197121:U-ACMEHOST\alesk,S-1-5-21-1611771360-925472152-3555864332-1002:/home/alesk:/bin/bash
And for a domain account you would execute:
$ /bin/mkpasswd -d -u alesk >> /etc/passwd
$ mkdir -p /home/alesk
$ chown alesk /home/alesk
2.5) Edit ssh config file:
notepad C:\cygwin\etc\sshd_config
or within cygwin.bat:
nano /etc/sshd_config
at the end of file add:
KexAlgorithms diffie-hellman-group-exchange-sha1,diffie-hellman-group1-sha1
I’m not sure what is the true reasoning for that, but probably for hardening the sshd security!?
2.6 Start SSH daemon:
Cygwin.bat
$ /usr/bin/sshd
or
$ cyrunsrv -S sshd
or start Windows service
Open cmd.exe with “Run as admninistrator”:
cmd> net stop "CYGWIN sshd"

cmd> net start "CYGWIN sshd"
If service doesn’t start check the log at C:\cygwin\var\log\sshd.log.
If you need to add some package afterwards, simply re-run setup.exe installer and check additional packages that you want to install.
CopSSH 4.2.1 on Windows 7/2008R2
As you might be aware of by now, CopSSH 4.2.1 was the last freely available CopSSH version. Hopefully, I downloaded this version before it was removed from ITeF!x site. CopSSH is still my favorite SSH server for Windows, in the future I’ll likely be more than willing to pay for binary builds but as of now, 4.2.1 is what we’ll be using on our Windows servers for a couple of years.
The objective is to replace CopSSH 1.4.2 – 1.4.6 running on Windows 2003 R2 (x64) with version 4.2.1, which we’ll install on various machines running Windows7 SP1 (x64) and Windows 2008 R2 SP1.
Since CopSSH is mainly used for password-less authentication (remote job execution), I’ll briefly document a PK authentication setup routine for a brand new box.
-
CLIENT SIDE
- take a backup of your existing CopSSH installation directory
- I prefer uninstalling existing CopSSH version instead of upgrading, because I believe CopSSH upgrading setup is broken and not worth the time to troubleshot. Go to Control Panel and deinstall copssh plus ICW related stuff (ICW Base, ICW COPSSHCP and ICW OpenSSHServer).
Check local users accounts, if you find that SvcCOPSSH account is still present after you previously deinstalled CopSSH, you must delete that account before you start with fresh installation!! Also delete %ProgramFiles(x86)%\ICW directory if you used default directory as a target for your old installation. - install CopSSH 4.2.1, more or less usual “Next-Next” routine
- activate local user that you’ll be using in your batch scripts (I activated my local account: alesk)
- open command line and prepare environment:
cmd> set PATH=%ProgramFiles(x86)%\ICW\bin;%PATH%
cmd> set HOME=/cygdrive/c/Program Files (x86)/ICW/home/alesk
- Generate private/public key pair:
cmd> ssh-keygen -t rsa

Generating public/private rsa key pair.
Enter file in which to save the key (/home/alesk/.ssh/id_rsa):
Enter passphrase (empty for no passphrase):
Enter same passphrase again:
When prompted for the passphrase, DO NOT enter password, just hit Enter twice, so that you’ll have no password protected key pair.
Make sure that you’re fully aware of security implications of no password protected key pairs. If you’re not sure about the consequence google around and make sure a proper file permissions are set on those two files! Discussion of security implications is simply above and beyond this topic. - Append public key (/home/alesk/.ssh/id_rsa.pub in my case) to the server authorized_keys file. Assuming that I have ssh daemon available at server:
- Here is an example where I added some properties to the key on server side, which limits what can owner of the key actually do on the server and from where…
# # example of the key which limits password less execution to particular host and predefined command # from="HP-LAPTOP,ASROCK,!Foo.acme.com",no-port-forwarding,no-X11-forwarding,no-agent-forwarding, no-pty,command="ls -l" ssh-rsa AAAAB3NzaC1yc2EAAAADAQABAAABAQC3TwQsIG6uGXGgGVhOgDLEyp33Qu7RqEJpxh1QlQQ4X2 Pdjind4Y6vyG4q0P/VLBisrs7/eC/kr+1mntu2Coh+MyMF2h6w1L+34Z53kpYWJgxv8Uc0qCmTGbPc nDt5xa/bcIYZp6pB2caDGUT+SQ0QAdhbA2Wy+1JIlav6C2GMDGwPPtiWMRJ0dCdczS2SdD8Z6pCib ZLaipnFOsLig93Hk9+AJNpgIhkJ/i03/w+a76aMcv5PEiwsZIk1vJZIXTI8L7eFRz2ICpd4qi6wN690Rtd W73W3zIRTe4HPMx2ESTVS26AHHS8qH0TlZEa3OGKA6a0OGkomdihQD5JpnBE7 alesk@HPWIN7
SERVER SIDE
cmd> scp  ~/.ssh/id_rsa.pub myserver:/home/alesk/.ssh/id_rsa.pub.tmp
cmd> ssh alesk@myserver
ssh> cat /home/alesk/.ssh/id_rsa.pub.tmp >> /home/alesk/.ssh/authorized_keys
ssh> rm  /home/alesk/.ssh/id_rsa.pub.tmp
Selectively disable UAC on Windows 7
During recent tests of ArcServe 16, I found out that command line tool cabatch.exe on my Windows 7 (x64) workstation triggers User Account Control (UAC) mechanism, resulting in a dialog box where I need to confirm application launch. This is unacceptable for automation of submitting backup jobs. Instead of completely disabling UAC on my Workstation I decided to turn off UAC selectively, just for a couple of CA command line tools. Here are the steps for cabatch:
Step 1) You’ll need “Microsoft Application Compatibility Toolkit 5.6”, you can download and install ApplicationCompatibilityToolkitSetup.exe from Microsoft site”.
Step 2) run Compatibility Administrator. In my case cabatch.exe is 32-bit binary, so I must launch 32-bit “Compatibility Administrator” from program group:
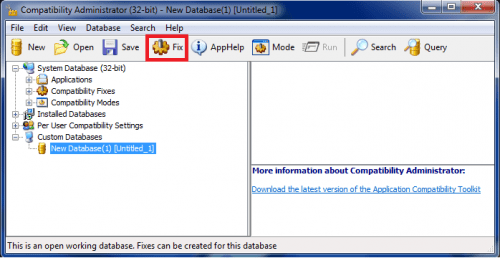
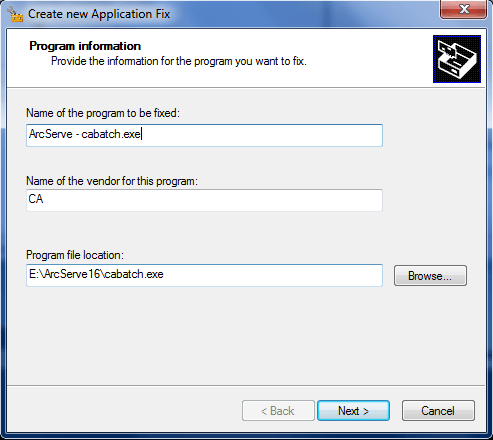
Click on Fix button and enter application info:
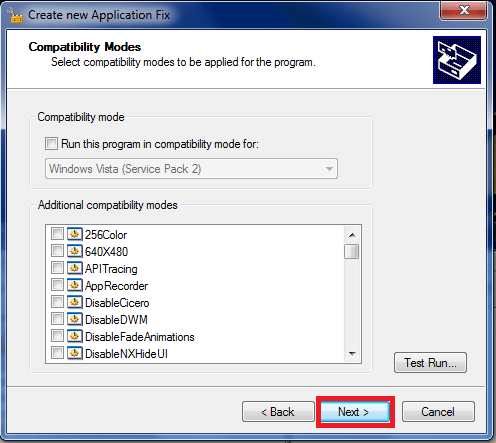
skip Compatibility mode with button Next:
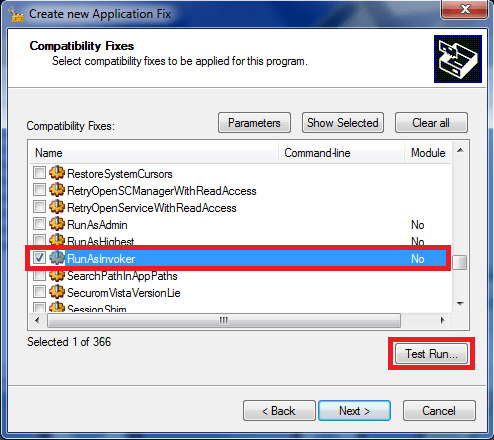
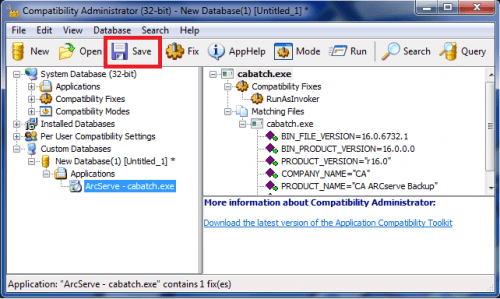
on Compatibility fixes scroll down until you find RunAsInvoker and check it (you can also run a test):
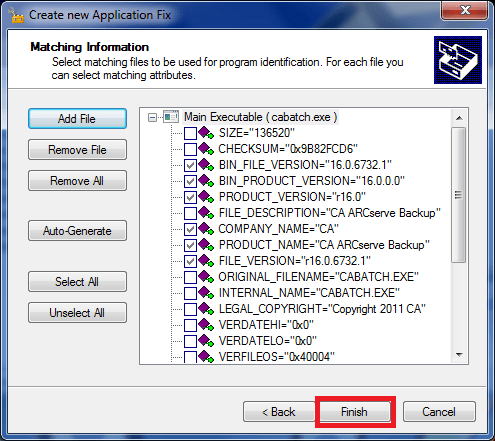
on Matching information screen leave everything as it is and click Finish:
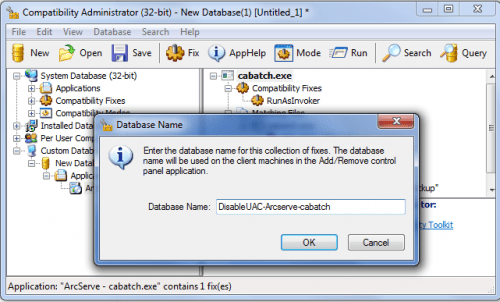
click on Save button to save newly created database:
name the database so, that you’ll know what it is for (DisablingUAC-app…):
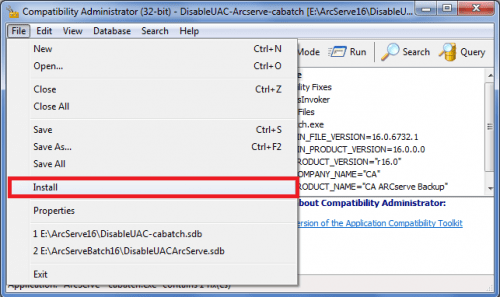
then open File menu and install database:
you’ll get confirmation if installation was successful:
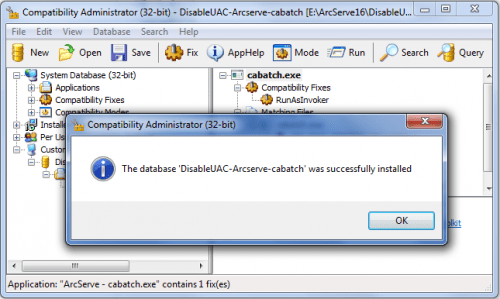
That’s it. No more UAC nagging while executing cabatch.exe.
OpenVPN & Windows 7
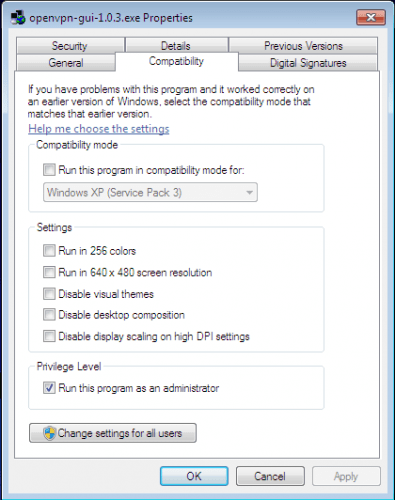
Skipping Vista altogether and moving to Windows 7 from XP as my primary workstation is causing me to troubleshoot my ignorance, here and there :-), especially with leveraged security built in Windows 7. One such application that I recently installed and that needs to run with admin rights is OpenVPN client. Routing part of OpenVPN client needs Administrator privileges. Instead of right clicking the application and picking “Run as Administator” each time, we can flag the application by right clicking executable, selecting Properties, then Compatibility tab and marking a check box “Run this program as an administrator” as shown on picture:

You must be logged in to post a comment.