Category Archives: MS Windows
Notes about various technical issues of supporting and administering Windows Servers.
nssm replacement for srvany
For many years I run a particular python script as a service on my Windows XP machine. I used Microsoft Resource Kit tool srvany to “host” my script as as service. Recently, I replaced my XP machine at workplace with new one, running Windows 7 x64. Unfortunately, Microsoft stopped developing this tool, I heard that it still works, even on Windows 7 x64, but nevertheless I consider srvany as being dead.
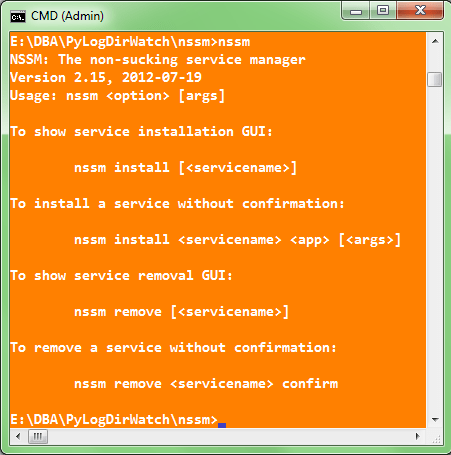
Fortunately, there is good alternative, NSSM – Non Sucking Service Manager, free replacement for srvany with a bonus – it’s build for both, 32-bit and 64-bit OS.
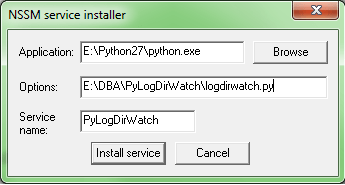
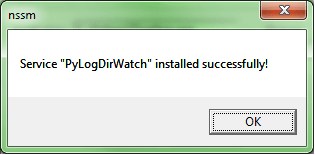
Download and simply unzip nssm archive, then open elevated command prompt and install the service with the command nssm install [], in my case:
cmd> nssm install PyLogDirWatch
ICONV for Windows
This is a short memo about installing iconv on Windows host (specifically: Windows 7 SP1 x64). Iconv is a handy Unix/Linux tool that is used for conversion between different character encodings.
Unfortunately, I’m not always in a position to use my favorite Linux distro at job, so here is a short recipe on how to setup iconv port for Win32.
- Download libiconv-1.9.1.bin.woe32.zip from Sourgeforge.net
- Download support library gettext-runtime-0.13.1.bin.woe32.zip from here. Make sure that you download exactly the version 0.13.1 and NOT newer, due to some compatibility issues!
- Create some directory, such as C:\UNIXUTIL\iconv
- Unzip the content of \bin from both zip files and save the content together in above directory.
The final content of iconv directory should look like this:
C:\UNIXUTIL\iconv>dir
 Volume in drive C has no label.
 Volume Serial Number is A88E-6A42

 Directory of C:\UNIXUTIL\iconv

11.10.2012  13:33    <DIR>          .
11.10.2012  13:33    <DIR>          ..
14.01.2004  21:59            28.672 asprintf.dll
14.01.2004  01:56            24.576 charset.dll
14.01.2004  21:59            20.480 envsubst.exe
14.01.2004  21:59            20.480 gettext.exe
07.10.2003  21:17             2.715 gettext.sh
14.01.2004  01:56           892.928 iconv.dll
14.01.2004  01:56            16.384 iconv.exe
14.01.2004  21:59            45.056 intl.dll
14.01.2004  21:59            20.480 ngettext.exe
              11 File(s)      1.071.780 bytes
               2 Dir(s)  57.396.654.080 bytes free

C:\UNIXUTIL\iconv>
Usage:
C:\UNIXUTIL\iconv>iconv --help
Usage: iconv [--binary] [-c] [-s] [-f fromcode] [-t tocode] [file ...]
or:    iconv -l
List of supported code pages:
C:\UNIXUTIL\iconv>iconv -l
Example of converting file from utf-8 to cp1250 encoding:
C:\UNIXUTIL\iconv>iconv -f utf-8 -t cp1250 utf-8.txt > cp1250.txt
CopSSH 4.2.1 on Windows 7/2008R2
As you might be aware of by now, CopSSH 4.2.1 was the last freely available CopSSH version. Hopefully, I downloaded this version before it was removed from ITeF!x site. CopSSH is still my favorite SSH server for Windows, in the future I’ll likely be more than willing to pay for binary builds but as of now, 4.2.1 is what we’ll be using on our Windows servers for a couple of years.
The objective is to replace CopSSH 1.4.2 – 1.4.6 running on Windows 2003 R2 (x64) with version 4.2.1, which we’ll install on various machines running Windows7 SP1 (x64) and Windows 2008 R2 SP1.
Since CopSSH is mainly used for password-less authentication (remote job execution), I’ll briefly document a PK authentication setup routine for a brand new box.
-
CLIENT SIDE
- take a backup of your existing CopSSH installation directory
- I prefer uninstalling existing CopSSH version instead of upgrading, because I believe CopSSH upgrading setup is broken and not worth the time to troubleshot. Go to Control Panel and deinstall copssh plus ICW related stuff (ICW Base, ICW COPSSHCP and ICW OpenSSHServer).
Check local users accounts, if you find that SvcCOPSSH account is still present after you previously deinstalled CopSSH, you must delete that account before you start with fresh installation!! Also delete %ProgramFiles(x86)%\ICW directory if you used default directory as a target for your old installation. - install CopSSH 4.2.1, more or less usual “Next-Next” routine
- activate local user that you’ll be using in your batch scripts (I activated my local account: alesk)
- open command line and prepare environment:
cmd> set PATH=%ProgramFiles(x86)%\ICW\bin;%PATH%
cmd> set HOME=/cygdrive/c/Program Files (x86)/ICW/home/alesk
- Generate private/public key pair:
cmd> ssh-keygen -t rsa

Generating public/private rsa key pair.
Enter file in which to save the key (/home/alesk/.ssh/id_rsa):
Enter passphrase (empty for no passphrase):
Enter same passphrase again:
When prompted for the passphrase, DO NOT enter password, just hit Enter twice, so that you’ll have no password protected key pair.
Make sure that you’re fully aware of security implications of no password protected key pairs. If you’re not sure about the consequence google around and make sure a proper file permissions are set on those two files! Discussion of security implications is simply above and beyond this topic. - Append public key (/home/alesk/.ssh/id_rsa.pub in my case) to the server authorized_keys file. Assuming that I have ssh daemon available at server:
- Here is an example where I added some properties to the key on server side, which limits what can owner of the key actually do on the server and from where…
# # example of the key which limits password less execution to particular host and predefined command # from="HP-LAPTOP,ASROCK,!Foo.acme.com",no-port-forwarding,no-X11-forwarding,no-agent-forwarding, no-pty,command="ls -l" ssh-rsa AAAAB3NzaC1yc2EAAAADAQABAAABAQC3TwQsIG6uGXGgGVhOgDLEyp33Qu7RqEJpxh1QlQQ4X2 Pdjind4Y6vyG4q0P/VLBisrs7/eC/kr+1mntu2Coh+MyMF2h6w1L+34Z53kpYWJgxv8Uc0qCmTGbPc nDt5xa/bcIYZp6pB2caDGUT+SQ0QAdhbA2Wy+1JIlav6C2GMDGwPPtiWMRJ0dCdczS2SdD8Z6pCib ZLaipnFOsLig93Hk9+AJNpgIhkJ/i03/w+a76aMcv5PEiwsZIk1vJZIXTI8L7eFRz2ICpd4qi6wN690Rtd W73W3zIRTe4HPMx2ESTVS26AHHS8qH0TlZEa3OGKA6a0OGkomdihQD5JpnBE7 alesk@HPWIN7
SERVER SIDE
cmd> scp  ~/.ssh/id_rsa.pub myserver:/home/alesk/.ssh/id_rsa.pub.tmp
cmd> ssh alesk@myserver
ssh> cat /home/alesk/.ssh/id_rsa.pub.tmp >> /home/alesk/.ssh/authorized_keys
ssh> rm  /home/alesk/.ssh/id_rsa.pub.tmp
ArcServe 16 – enabling cabatch capability for DBA
We’re planning to replace our aging backup server running CA ArcServe 11.5 with the latest and bloodiest greatest ArcServe 16.0. My role in this migration is to ensure that our existing scripts that rely on cabatch command line tool works as expected.
Our test env. configuration consists of:
- ArcServe 16 standalone server installed on Windows 2008 R2 x64 (let’s call it WINBACKUPSRV)
- Windows 7 (x64) workstation that backup Operator uses to send backup jobs to ArcServe backup server (let’s call it WIN7BACKUP)
All backup scripts (.asx files) are prepared on backup server by a DBA. Backup operator must be able to submit backup jobs (*.asx files) to ArcServe, which means we need to create caroot equivalence for him/her.
1) SERVER SIDE
Installation of ArcSerce 16 is not covered here, it’s enough to summarize options that were installed on WINBACKUPSRV:
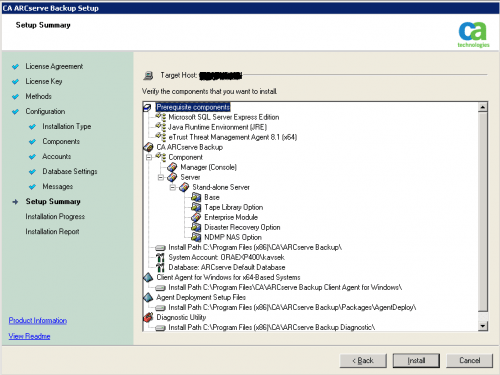
and the build version:
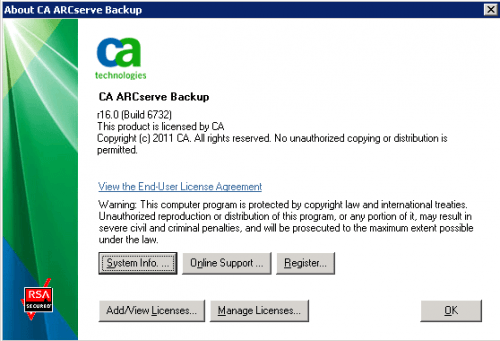
In my case ArcServe 16 was installed under local Administrator account and this local account is automatically granted “ArcServe Administrator” role. Note that Roles were introduced with ArcServe 12.
Note: “User profiles Manager” is shown only if you loged on to ArcServe with caroot account!!
You should keep your caroot account information secret, don’t allow a bunch of administrators to use this account for day to day job activities on backup server. You should either grant appropriate role to Windows authenticated user or create internal (ArcServe specific) account. For example, I want to create internal account for myself with command line tool ca_auth:
Let’s display short help for ca_auth:
C:\Program Files (x86)\CA\ARCserve Backup>ca_auth -user

Usage :
        ca_auth [-cahost host] -user     add username [passwd] [-assignrole [rolelist]]
        ca_auth [-cahost host] -user     delete username
        ca_auth [-cahost host] -user     chgpasswd username [passwd]
        ca_auth [-cahost host] -user     chgrole username [rolelist]
        ca_auth [-cahost host] -user     validate username [passwd]
        ca_auth [-cahost host] -user     group username
        ca_auth [-cahost host] -user     getall
C:\Program Files (x86)\CA\ARCserve Backup>ca_auth -user add alesk mysecretpwd


Current Available Role List:
=====================================

1) Backup Operator
2) Restore Operator
3) Device Operator
4) Tape Operator
5) Security Administrator
6) Report Operator
7) Monitor Operator
8) ARCserve Administrator
9) Ownership Checking Exemption Privilege

=====================================


Please assgin roles for this user, you can assign more than one role at a time and
should seperate the selection with comma: 8
If we want to list all existing accounts (internal as well as Windows authenticated):
C:\Program Files (x86)\CA\ARCserve Backup>ca_auth -user getall

User names:

        caroot
        WINBACKUPSRV\administrator
        alesk

Note that in my case I have among ArcServe users two internal accounts (caroot and previously created alesk)
and one windows authenticated that was created by default during ArcServe installation.
I’ll be using internal account (alesk) to prepare backup scripts (*.asx), but I would like to delegate execution of those scripts to some backup operator via cabatch command line utility. All I want is to give backup operator (Joe) a possibility to submit backup jobs (asx) to ArcServe with command line tool cabatch from his workstation (WIN7BACKUP). To allow Joe to submit backup jobs to server we must create caroot equivalence for him.
Let’s display short help for -equiv:
C:\Program Files (x86)\CA\ARCserve Backup>ca_auth -equiv

Usage :
        ca_auth [-cahost host] -equiv    add domainname\ntuser hostName ARCserveBackupUser [caroot_username] [caroot_password]
        ca_auth [-cahost host] -equiv    getequiv [domainname\ntuser hostName]
        ca_auth [-cahost host] -equiv    delete domainname\ntuser hostName [caroot_username] [caroot_password]
        ca_auth                         -equiv    whoami
If Joe is logging on his workstation (WIN7BACKUP) with his domain account ACME\joe then the command would be:
cmd>ca_auth -equiv add ACME\joe WIN7BACKUP caroot caroot carootsecretpwd
To check if equivalence exists:
cmd>ca_auth -equiv getequiv ACME\joe WIN7BACKUP
Equivalent ARCserve user for ACME\joe@WIN7BACKUP : caroot
Note: username, domain and hostname are case sensitive!
2) WORKSTATION FOR OPERATOR
In ArcSercve 11.x it was enough if we simply copied cabatch.exe with necessary libraries to operator workstation.
For cabatch to work in ArcServe 16, we need to install ArcServe Manager to Joe workstation (WIN7BACKUP).
After installation of ArcServe 16 Manager, I tried to execute some test backup with:
cmd> cabatch /H=WINBACKUPSRV /S=BackupTest.asx
and received strange error:
*** Can't find out the primary server of WIN7BACKUP
I spent a couple of hours troubleshooting this error, from checks that all Arcserve services properly run on my workstation (WIN7BACKUP) to recreating caroot equivalence…until I realized that my $ARCSERVEHOME\config\discovery.cfg file is empty, without any information about my backup server (WINBACKUPSRV). I added the following two lines to discovery.cfg and backup submit worked:
# note that DOMAIN is ArcServe domain, not Windows domain!
DOMAIN  WINBACKUPSRV
PRIMARY WINBACKUPSRV
3 KNOWN ISSUES
So far, the only unexplained issue is a timeout from the time we hit enter on cabatch and the time backup appears on backup server. In 11.5 the timeout was really short (2-5 seconds), in 16.0 timeout is substantial (60-80 seconds). It’s not a show stopper but certainly something I’ll be paying attention for awhile.
Another issue that is actually not related to ArcServe is UAC control in Windows 7, however the issue is easily resolved (more on this in another post).
Selectively disable UAC on Windows 7
During recent tests of ArcServe 16, I found out that command line tool cabatch.exe on my Windows 7 (x64) workstation triggers User Account Control (UAC) mechanism, resulting in a dialog box where I need to confirm application launch. This is unacceptable for automation of submitting backup jobs. Instead of completely disabling UAC on my Workstation I decided to turn off UAC selectively, just for a couple of CA command line tools. Here are the steps for cabatch:
Step 1) You’ll need “Microsoft Application Compatibility Toolkit 5.6”, you can download and install ApplicationCompatibilityToolkitSetup.exe from Microsoft site”.
Step 2) run Compatibility Administrator. In my case cabatch.exe is 32-bit binary, so I must launch 32-bit “Compatibility Administrator” from program group:
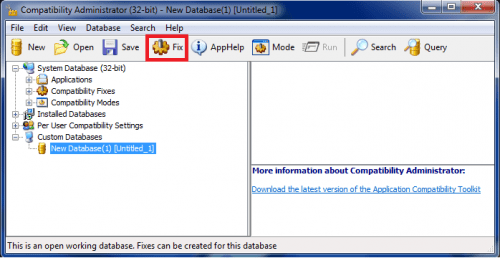
Click on Fix button and enter application info:
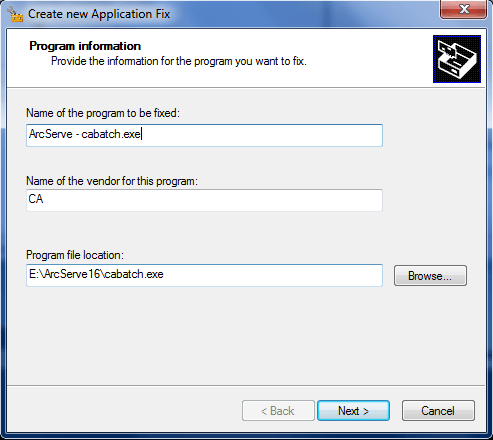
skip Compatibility mode with button Next:
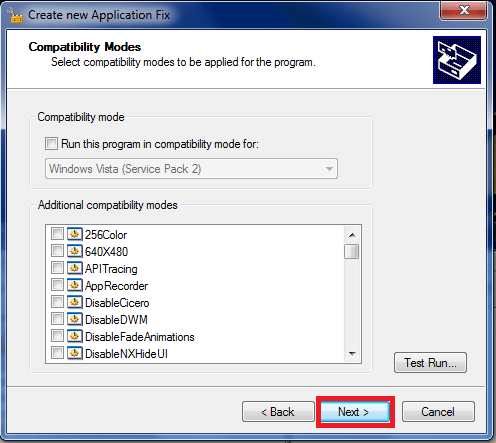
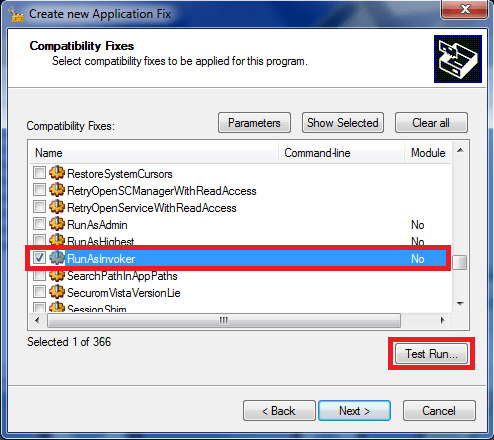
on Compatibility fixes scroll down until you find RunAsInvoker and check it (you can also run a test):
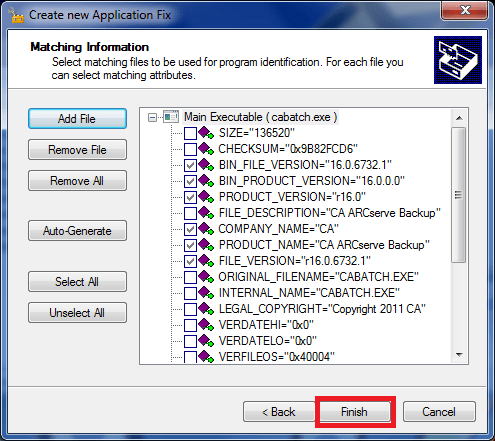
on Matching information screen leave everything as it is and click Finish:
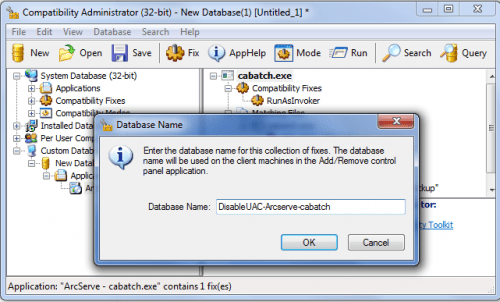
click on Save button to save newly created database:
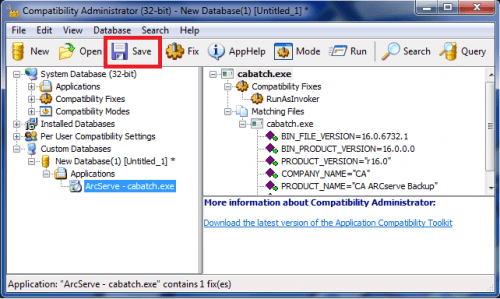
name the database so, that you’ll know what it is for (DisablingUAC-app…):
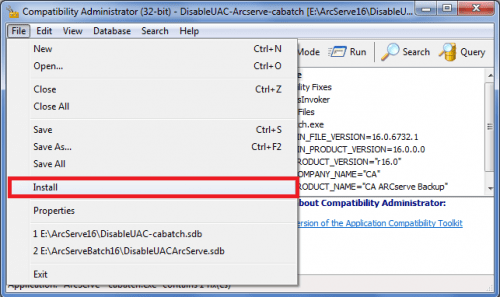
then open File menu and install database:
you’ll get confirmation if installation was successful:
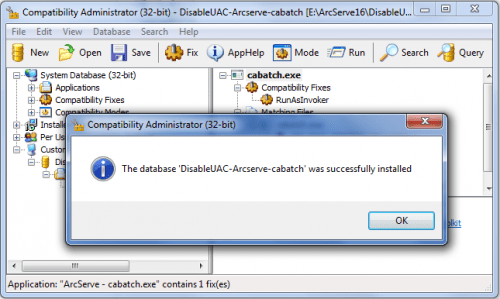
That’s it. No more UAC nagging while executing cabatch.exe.

You must be logged in to post a comment.