Author Archives: alesk
Reading ServersCheck Status page from command line – Part 2.
In the Part 1. of the article I showed command line tool written with Google Go that reads current values from ServersCheck temperature and humidity sensor. In part 2 of the article I’ll show you how I did the same with PowerShell 3.0 script. In a way this script is more sophisticated than the golang variant. First because of the way how password for ServersCheck is handled, instead of security by obscurity I’m asking user once for a password, then storing password encrypted with a combination of his/her computer private key + user session key in a local file vpctemp-pwd.txt. Not bullet proof but nevertheless a big improvement from golang version of the script.
Second, the way I parse xml in powershell is simplified, thanks to select-xml cmdlet built in powershell 3.0.
A prerequisite for running the script is:
– PowerShell 3.0 (hence .NET 4 framework is also needed)
– execution policy must be set to RemoteSigned
You can check PowerShell version with:
PS> get-host | select version
and execution policy with (make sure that you run PowerShell in Admin mode!):
PS> Get-ExecutionPolicy

and if it's not RemoteSigned change it with:

PS> Set-ExecutionPolicy RemoteSigned
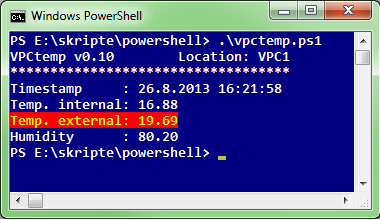
Final result of the script is output similar to golang version:
And here is the powershell script source:
#
# vpctemp.ps1 - PowerShell 3.0 script
# by AlesK
#
$version = "v0.10"
$uri = "http://10.10.10.1/retcurvalue.xml"
$username = "admin"
$pwdfile = ".\vpctemp-pwd.txt"

if (Test-Path $pwdfile) {
 $password = Get-Content $pwdfile | ConvertTo-SecureString
}
else {
 $password = Read-Host "Password for Admin" -AsSecureString
 $password | ConvertFrom-SecureString | Out-File $pwdfile
}

$credential = New-Object System.Management.Automation.PSCredential $username,$password

$result = Invoke-Webrequest -URI $uri -Credential $credential -UseBasicParsing

[xml]$xml = $result | select -expand Content

$temp1 = $xml | select-xml -xpath '/retcurvalue/ssvalue0' | select -expand Node
$temp2 = $xml | select-xml -xpath '/retcurvalue/ssvalue1' | select -expand Node
$hum1  = $xml | select-xml -xpath '/retcurvalue/ssvalue2' | select -expand Node
$timestamp = Get-Date

Write-Host "VPCtemp $version        Location: VPC1"
Write-Host "***********************************"
Write-Host "Timestamp     :", $timestamp
Write-Host "Temp. internal:", $temp1."#text"
Write-Host "Temp. external:", $temp2."#text" -foregroundcolor "yellow" -backgroundcolor "red"
Write-Host "Humidity      :", $hum1."#text"
In the final, part 3 of the article I’ll show you how we’re using Oracle external table “preprocessor” feature to display data center temperature and humidity with simple SQL statement.
Reading ServersCheck Status page from command line – Part 1.
A year ago we installed ServersCheck Temperature & Sensor Gateway that measures temperature and relative humidity in our data center. The gateway itself is a convenient (approx. 10cm long) piece of HW that you can easily mount in some free spot in a rack.

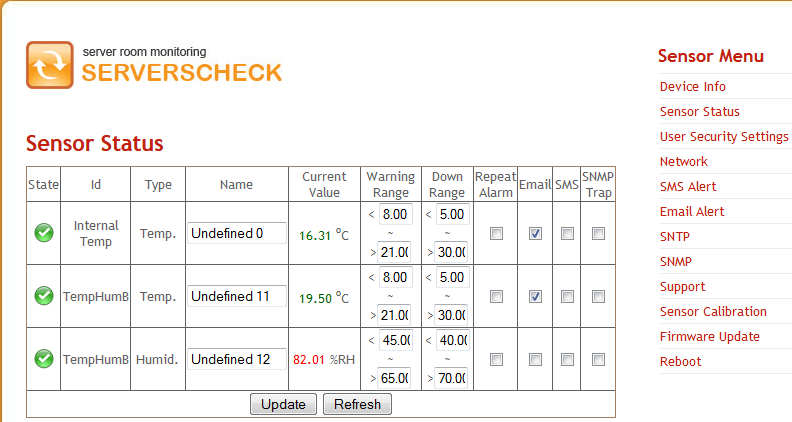
It comes with a built-in web server where you can configure various settings and read current status of device, including internal temperature (inside sensors), external temperature and in our case humidity. After you login to ServerCheck web application you can check status in the data center:
Nice, but I would prefer if I could simply skip the user interaction with a GUI; why not run s simple command line tool/script that will display temperature and humidity in our data center. The bonus feature would be to allow us to simply select ServersCheck status from SQL*Plus.
In the first part of the article I’ll show you how I did it with a simple Google Go program.
Note that we’re currently using ServersCheck gateway with Hardware version: 4.0, Firmware version 2.11. This program might or might not work for you if you’re using something else.
Since ServersCheck gateway doesn’t ship with some documented API I had to do some research and finally found that sensor status data is served from simple xml page that is accessible from h t t p=//10.10.10.10/retcurvalue.xml (replace dummy IP with the IP that you assigned to your ServersCheck gateway).
<retcurvalue>
<ssvalue0>16.06</ssvalue0>
<ssvalue1>19.75</ssvalue1>
<ssvalue2>78.65</ssvalue2>
<ssvalue3>?</ssvalue3>
<ssvalue4>?</ssvalue4>
<ssvalue5>?</ssvalue5>
<ssvalue6>?</ssvalue6>
...
...
</retcurvalue>
So all that we need to do is to authenticate to ServersCheck internal webserver, parse xml and display temperature and humidity….something like this:
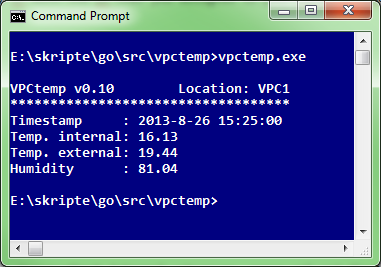
I thought it would be a good exercise to write this with a Google Go, so here it goes:
//
// vpctemp.go by alesk (excercise in golang)
//
package main

import (
	"fmt"
	"io/ioutil"
	"log"
	"net/http"
	"regexp"
	"strings"
	"time"
)

const (
	VERSION   = "0.10"
	LOCATION  = "DATACENTER1"
	STATUSURL = "http://10.10.10.1/retcurvalue.xml"
	USER      = "admin"
	PWD       = "r049D;FMNgGHHLFKRRJEJFDD"
	TIMEFORMAT = "2006-1-2 15:04:05"
)

type SensorStatus struct {
	temp1 string // <ssvalue0> internal temperature
	temp2 string // <ssvalue1> external sensor temperature
	hum1  string // <ssvalue2> relative humidity
}

var sensor SensorStatus

func main() {

	request, err := http.NewRequest("GET", STATUSURL, nil)
	// I'm using simple obfuscation function getFoo to prevent casual password
	// leak - this is more than adequate approach in my case. You're free to
	// change the code to ask user for a password every time or do something more clever.
	request.SetBasicAuth(USER, getFoo(PWD))

	client := &http.Client{}
	response, err := client.Do(request)

	if err != nil {
		log.Fatal(err)
	}
	defer response.Body.Close()

	body, err := ioutil.ReadAll(response.Body)

	// uncomment the following line if you wish to print the content of complete xml
	// fmt.Println(string(body))		// debugging

	// print values <ssvalue0,1,2> without tags
	// obviously I could use encoding/xml package in golang standard library but
	// rather than that took a shortcut with a simple regex string parsing.
	re := regexp.MustCompile("<[/]?ssvalue[0-9]>")
	i := 0
	for _, line := range strings.Split(string(body), "\n") {
		if i < 4 {
			//skip first line <retcurvalue>
			if i != 0 {
				switch i {
				case 1:
					sensor.temp1 = re.ReplaceAllString(line, "")
				case 2:
					sensor.temp2 = re.ReplaceAllString(line, "")
				case 3:
					sensor.hum1 = re.ReplaceAllString(line, "")
				}
			}
			i += 1
		} else {
			break
		}
	}
	timestamp := time.Now().Format(TIMEFORMAT)
	fmt.Printf("\nVPCtemp v%s        Location: %s\n", VERSION, LOCATION)
	fmt.Println("***********************************")
	fmt.Printf("Timestamp     : %s\n", timestamp)
	fmt.Printf("Temp. internal: %s\n", sensor.temp1)
	fmt.Printf("Temp. external: %s\n", sensor.temp2)
	fmt.Printf("Humidity      : %s\n", sensor.hum1)
}

func getFoo(foo string) string {
	bar := foo[22:24] + foo[16:19] + foo[10:11] + foo[3:4] + foo[12:13] + foo[4:6]
	return strings.Replace(bar, "V", "v", 1)
}
In the part 2 I’ll show you how little code was needed to script my “vpctemp” with PowerShell 3.0.
Installing Collabnet Subversion Edge Server On Oracle Linux
Here is my note about installation of Collabnet Subversion Edge Serve 4.0.1 on dedicated Oracle Linux 6.4. Subversion Edge Server is revision control repository of all my production DBA/SA scripts.
OS information
$ lsb_release -a
LSB Version:    :base-4.0-amd64:base-4.0-noarch:core-4.0-amd64:core-4.0-noarch:graphics-4.0-amd64:graphics-4.0-noarch:printing-4.0-amd64:printing-4.0-noarch
Distributor ID: OracleServer
Description:    Oracle Linux Server release 6.4
Release:        6.4
Codename:       n/a
Download and install Oracle JDK 1.6
$ pwd
/home/alesk/Downloads/JDK

$ ls
jdk-6u45-linux-x64-rpm.bin

$ chmod a+x jdk-6u45-linux-x64-rpm.bin

$ sudo ./jdk-6u45-linux-x64-rpm.bin

Unpacking...
Checksumming...
Extracting...
UnZipSFX 5.50 of 17 February 2002, by Info-ZIP (Zip-Bugs@lists.wku.edu).
  inflating: jdk-6u45-linux-amd64.rpm
  inflating: sun-javadb-common-10.6.2-1.1.i386.rpm
  inflating: sun-javadb-core-10.6.2-1.1.i386.rpm
  inflating: sun-javadb-client-10.6.2-1.1.i386.rpm
  inflating: sun-javadb-demo-10.6.2-1.1.i386.rpm
  inflating: sun-javadb-docs-10.6.2-1.1.i386.rpm
  inflating: sun-javadb-javadoc-10.6.2-1.1.i386.rpm
Preparing...                ########################################### [100%]
        package jdk-2000:1.6.0_45-fcs.x86_64 is already installed

Done.

// we can delete extracted rpm files afterwards...
$ sudo rm *.rpm

$ ls -l /usr/java/latest
lrwxrwxrwx 1 root root 21 Aug  7 14:38 /usr/java/latest -> /usr/java/jdk1.6.0_45
Prepare target directory
$ sudo mkdir /u01/dbaSVN
$ sudo chown -R alesk:dba /u01/dbaSVN
$ sudo chmod 750 /u01/dbaSVN
Download and install Subversion Edge Server
$ pwd
$ /home/alesk/Downloads/COLLABNET
$ tar -C /u01/dbaSVN -xzf CollabNetSubversionEdge-4.0.1_linux-x86_64.tar.gz
Configure Server Edge to start automatically
$ export JAVA_HOME=/usr/java/default
$ cd /u01/dbaSVN/csvn
$ sudo -E bin/csvn install

Detected RHEL or Fedora:
 Installing the CSVN Console daemon..
Setting RUN_AS_USER to: 'alesk'. Please edit '../data/conf/csvn.conf' if this needs to be adjusted
Setting JAVA_HOME to: '/usr/java/default'. Please edit '../data/conf/csvn.conf' if this needs to be adjusted.
Start the server as user, not root!!
$ /u01/dbaSVN/csvn/bin/csvn start

Starting CSVN Console......
CSVN Console started
Waiting for application to initialize (this may take a minute)............................................................................
WARNING: CSVN Console timed-out waiting for http://localhost:3343/csvn
Login on server with your browser
// use your browser to connect to http://localhost:3343/csvn or
// SSL protcted version: https://localhost:4434/csvn

$ firefox &


Configure Apache Subversion server to start automatically at boot
// before executing the following commands login to Edge Console
// and start the server via GUI, then...
$ cd csvn
$ sudo bin/csvn-httpd install

Detected RHEL or Fedora:
 Installing the Subversion Edge Apache Server daemon..
Open ports 4434 and 18080 on firewall
// I'm using ANSI GUI tool for that...
// Customize -> Forward -> Add (once for each port) -> Close
$ sudo system-firewall-tui
SQL Server BI Studio 2008R2 on Windows 7 (x64) Gotcha
Yesterday migration of our main OLAP server from MS Analysis’s Services 2005 to 2008 R2 was (more or less) uneventful experience, we thought installing “SQL Server Business Intelligence Development Studio” on developers desktops running Windows 7 x64 would be as dull as migration itself. That was not the case. It took us almost half a day troubleshooting error that prevented us to open any Cubes in our migrated databases from developer workstation. Every attempt was greeted with the error “Insufficient memory to continue the execution of the program”.
Configuration of the workstation looks like this:
- Windows 7 Enterprise (x64)
- Oracle client 11gR2 (32-bit)
- MS Office 2010 (32-bit)
- MS SQL Server BI Studio 2008 R2 (32-bit)
- HW: Fujitsu Esprimo Workstation with iCore5 and 8GB of RAM
Everything patched to the maximum possible level as of May-21-2013. My first assumption was that something related to x64 vs. x86 miss-match between installed components is preventing VS shell to open the cube, but how if all components that need to work together are 100% 32-bit!?
After I dismissed my initial hunch and some other miss-trials, I did what every self respecting systems engineer does in such situation. I went to seek some intimacy in my “cubicle”, then when no one was looking I opened the Chrome and asked Google for help. Typical day in the life of SE, don’t you think?
At last I found a post from Jerry Nee in this thread, pointing to Microsoft Download Center where we can download “Office 2003 Add-in: Office Web Components” needed by MS BI Studio 2008R2 to browse the cubes. After I installed owc11.exe on developer’s workstation browsing cubes was at last possible.
Many thanks to Chief Software Architects at Microsoft. Keep up with your work, as long as you’re doing your job as you do, I’m not worried to loose mine.
PostgreSQL 9.2 installation on OEL 6.4
This is my first note in a series of posts about supporting PostgreSQL on OEL 6.4. Let me start with a fair warning, I’m a total newbie when it comes to PostgreSQL (or PG in short). Don’t have any PG database in production, but this might (and I’m sure it will!) change sooner or later — you know what they say that necessity is the mother of invention. Considering economic downturn that’ll likely last to the end of this decade (or even further)…and you find yourself happy that you have at least some alternative.
Actually, I was always fond to an idea to replace some production “big vendor” databases (in particular Oracle, MS SQL and MySQL) with the most sophisticated free & OSS database on the planet. Sure, PG has some “critical” shortcomings (such as complete lack of proper auditing and even worse, the lack of proper incremental binary backup/recovery tools similar to Oracle RMAN), but the robust, feature-rich, MVCC capable RDBMS is more than enough to handle all sorts of application workload without the need to worry about licenses. Let’s start with installation steps for installation of PG 9.2.4 on OEL 6.4:
Let’s check what we already have on OEL 6.4:
[root@acme ~]# uname -r
2.6.39-400.17.1.el6uek.x86_64

[root@acme ~]# yum info postgresql | grep Version
Version     : 8.4.13
Let’s get rid of PG 8.4.13:
[root@acme ~]# yum erase postgresql

// disable OEL 6.4 default PG repository by adding exclude=postgresql* to
// /etc/yum/pluginconf.d/rhnplugin.conf

[root@acme ~]# nano /etc/yum/pluginconf.d/rhnplugin.conf

[root@acme ~]# cat /etc/yum/pluginconf.d/rhnplugin.conf
[main]
enabled = 0
gpgcheck = 1
exclude=postgresql*
Now we need to install current (PG 9.2) repository:
# rpm -Uvh http://yum.postgresql.org/9.2/redhat/rhel-6.4-x86_64/pgdg-redhat92-9.2-7.noarch.rpm
Now, the installation is as easy as:
# yum install postgresql92-server postgresql92 postgresql92-contrib

....
Dependencies Resolved

===============================================...
 Package                               Arch    ...
===============================================...
Installing:
 postgresql92                          x86_64
 postgresql92-contrib                  x86_64
 postgresql92-server                   x86_64
Installing for dependencies:
 postgresql92-libs                     x86_64
 uuid                                  x86_64

Transaction Summary
===============================================...
Install       5 Package(s)

Total download size: 5.4 M
Installed size: 23 M
Is this ok [y/N]:
...

[root@acme ~]# psql --version
psql (PostgreSQL) 9.2.4
Now, we need to initialize PG cluster and create our first superuser (me;):
// you can't run initdb as root, you must become user under which
// postgres server will run! By default the OS user is postgres.

[root@acme ~]# su - postgres

// cluster initialization. Note that I told initdb my locale, which is
// specific to my country. It's important for further
// creation of databases in the cluster to specify correct locale!!
// Also note, that I could tell initdb where to create data directory, let's // say on some dedicated mount point, such as:
// --pgdata=/u01/pg92/data
// as this is my test database, I don't mind having data files
// in default location (/var/lib/pgsql/9.2/data)

-bash-4.1$ /usr/pgsql-9.2/bin/initdb --locale=sl_SI.UTF8

The files belonging to this database system will be owned by user "postgres".
This user must also own the server process.

The database cluster will be initialized with locale "sl_SI.UTF-8".
The default database encoding has accordingly been set to "UTF8".
The default text search configuration will be set to "english".

fixing permissions on existing directory /var/lib/pgsql/9.2/data ... ok
creating subdirectories ... ok
selecting default max_connections ... 100
selecting default shared_buffers ... 32MB
creating configuration files ... ok
creating template1 database in /var/lib/pgsql/9.2/data/base/1 ... ok
initializing pg_authid ... ok
initializing dependencies ... ok
creating system views ... ok
loading system objects' descriptions ... ok
creating collations ... ok
creating conversions ... ok
creating dictionaries ... ok
setting privileges on built-in objects ... ok
creating information schema ... ok
loading PL/pgSQL server-side language ... ok
vacuuming database template1 ... ok
copying template1 to template0 ... ok
copying template1 to postgres ... ok

WARNING: enabling "trust" authentication for local connections
You can change this by editing pg_hba.conf or using the option -A, or
--auth-local and --auth-host, the next time you run initdb.

Success. You can now start the database server using:

    /usr/pgsql-9.2/bin/postgres -D /var/lib/pgsql/9.2/data
or
    /usr/pgsql-9.2/bin/pg_ctl -D /var/lib/pgsql/9.2/data -l logfile start
Now, we need to setup some basic parameters that’ll allow us to connect to the PG over the network:
//
// setup static IP for PG "listener" (postmaster)
// Obviously make sure that port 5432 is open on firewall!
//

-bash-4.1$ nano /var/lib/pgsql/9.2/data/postgresql.conf

listen_addresses='192.168.1.100'
port = 5432

//
// edit PG permissions in pg_hba.conf
// In my case I limited network access to my 2 workstations.
// md5 encrypted passwords are recommended method for login!
//

-bash-4.1$ nano /var/lib/pgsql/9.2/data/pg_hba.conf

host    all             all             192.168.1.110/24          md5
host    all             all             192.168.1.120/24          md5
Post installation configuration:
// start PG

# service postgresql-9.2 start
Starting postgresql-9.2 service:                           [  OK  ]

// if you want PG to start on boot...

[root@acme ~]# chkconfig | grep postgresql-9.2
postgresql-9.2  0:off   1:off   2:off   3:off   4:off   5:off   6:off

# chkconfig --levels 235 postgresql-9.2 on

// create superuser...

root@acme ~]# su - postgres
-bash-4.1$ psql postgres
psql (9.2.4)
Type "help" for help.

postgres=# CREATE ROLE alesk WITH SUPERUSER LOGIN PASSWORD 'mysecret';
CREATE ROLE
postgres=#

You must be logged in to post a comment.